Français
 Français
Good evening,
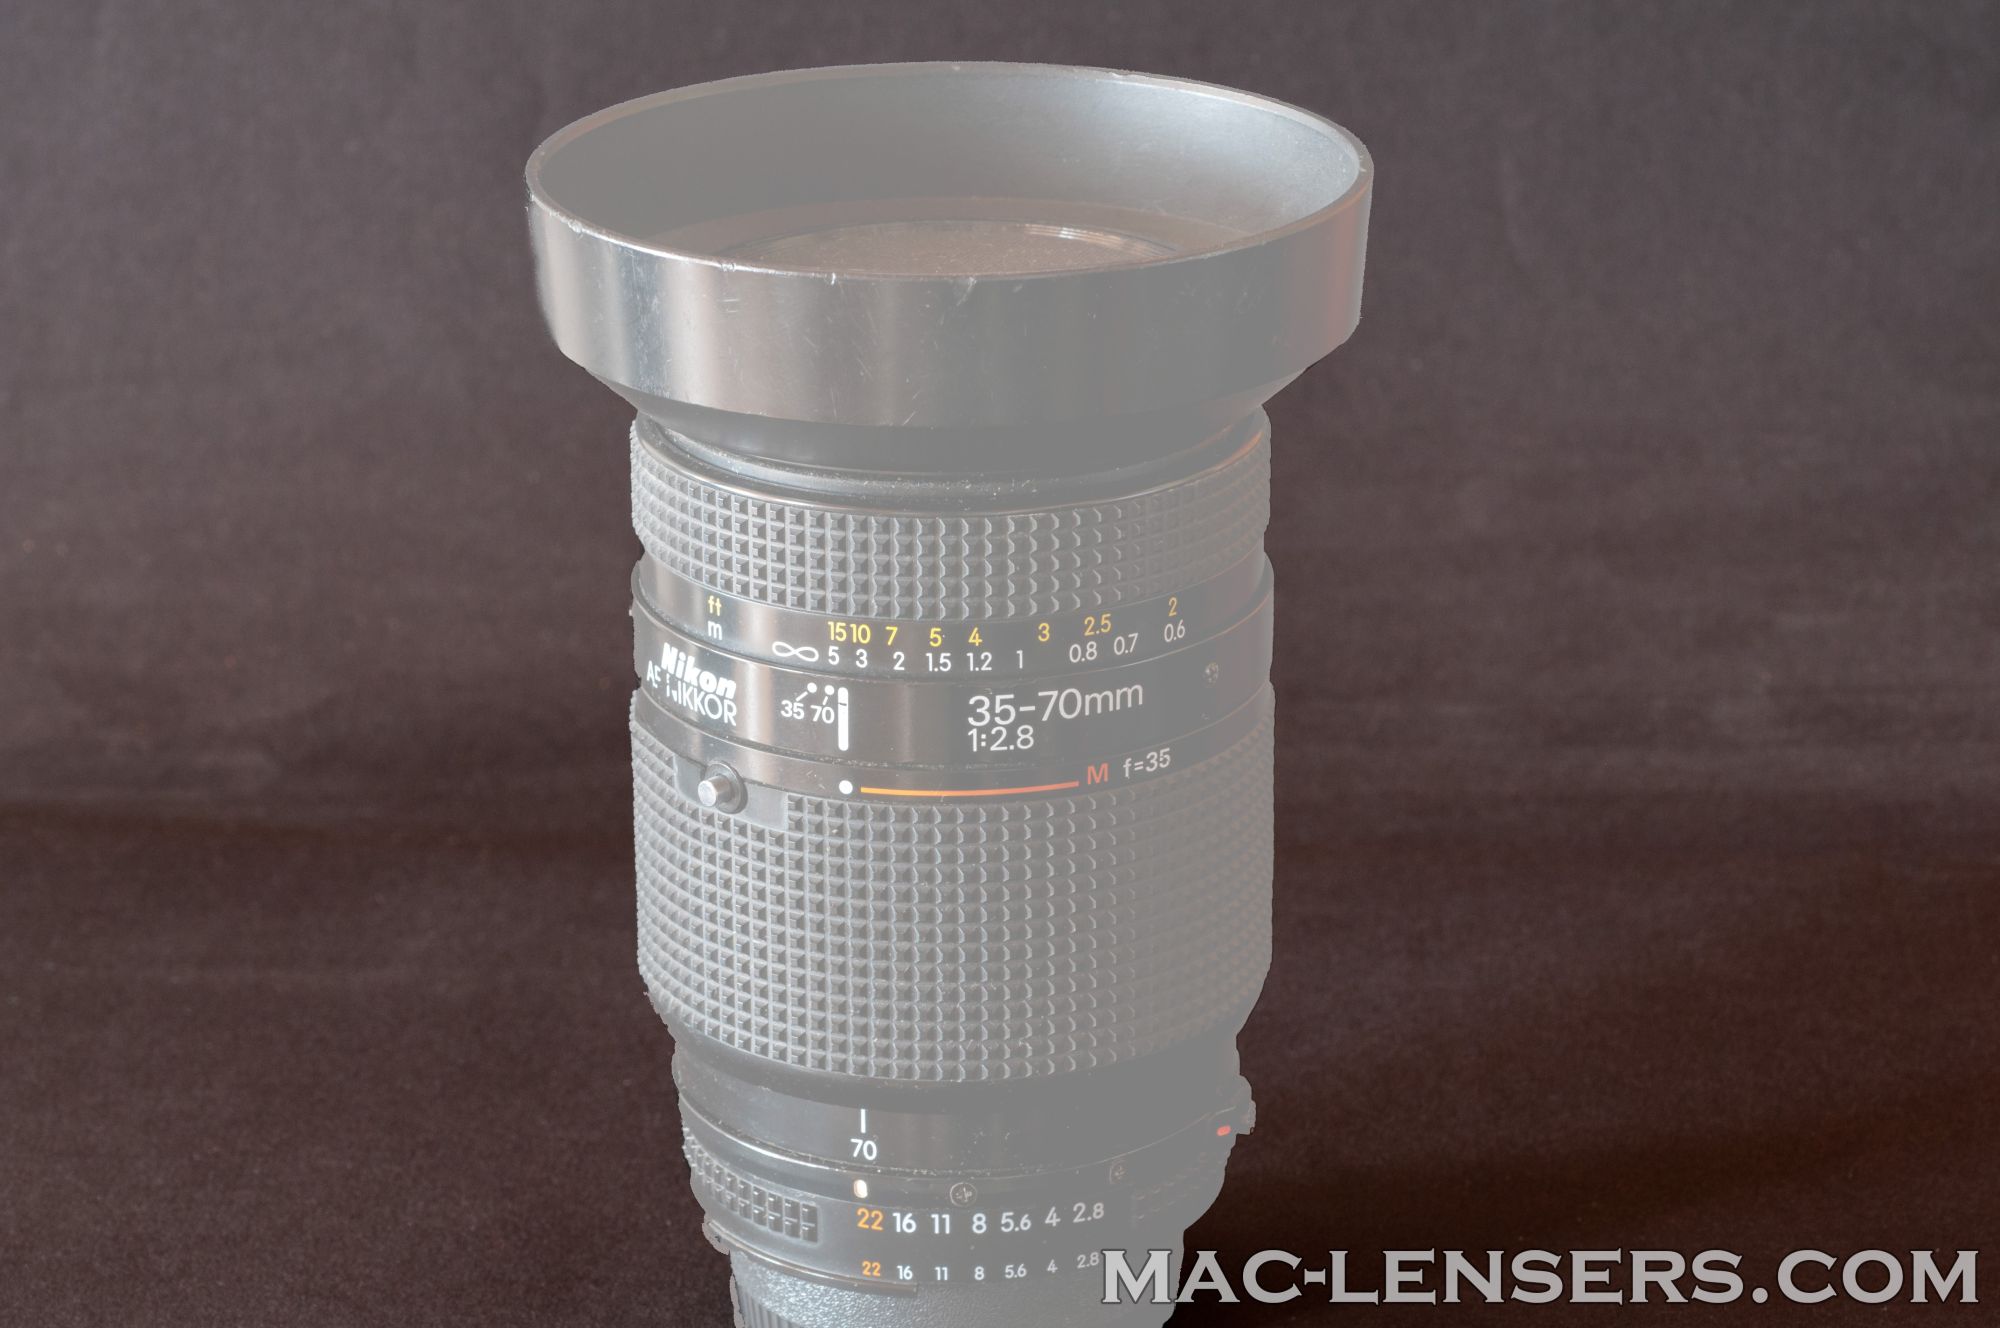
Today we are going to talk about a zoom that I particularly like: the Nikon AF 35-70mm f/2.8D (or not D).
It is one of the very first professional zooms with autofocus from the yellow brand. It is especially good for portraits, and in low light due to its large aperture.
What I particularly like is its relatively small size for a zoom of this aperture and this quality. It's obviously not the lightest, due to its all-metal construction, but isn't as big as its successors, the AF-S 28-70mm f/2.8D and the 24-70mm f/2.8G . Those equipped with an internal motorization are indeed much larger and heavier. They are more prone to breakdowns, in particular of this internal motor.
Technical
Successor to the 35-70mm f/3.5 Ai and Ai-S zooms, this lens was produced from 1987 to 2005. It is a push-pull zoom positioned at 70mm folded and sliding down to 35mm. The smallest focal length offers a "macro" position up to the ratio of ¼ - what is not really extraordinary, but can help out occasionally.
Its optical formula is made up of 15 elements divided into 12 groups. Diaphragm has 7 blades.
It weighs around 670 grams, what is quite heavy for a zoom of that focal range. But this is much lower than its successors that weigh about 900 grams.
The filter thread is 62mm, what is the standard size of many filters of the 80s-90s and avoids having to buy filters with large diameter, that are more expensive. If you have other lenses of the same diameter, then you won't need to buy new ones.
Some sample shots
Thanks to its large aperture, and its very good sharpness, this lens stands out particularly in low light conditions, and also for portraits. These photos were all taken with a D700 at ISO 3200.


Maintenance
We're going to tackle a recurring problem with this lens: haze. Many copies of this production – that started 35 years ago all the same – have indeed been affected by this problem. This is probably related to the glue used to bond the blocks, that degraded over time and got stuck between the lenses.

We can see that the view through the lens is dull because of this haze.

This operation is not the most complicated, but it involves one or two tedious steps and requires a minimum of organization.
First, we mark with an erasable marker a stroke that will serve to replace the helicoid.
If you wonder why, do not hesitate to read this article.
So I focused at infinity and marked the front part opposite the focus line.

Once the stroke has been marked, you have to remove the rubber from the focusing ring and turn it a little to show the two screws that hold the front block.

Once these two screws are visible, use a 2.3 wide flat screwdriver to remove them. Then very slowly unscrew the front ring without removing it.

It is imperative to mark the place where the ring and the helicoid separate, to be able to put it back later. As with the front block, I lined up at the distance marker.

Once the ring is removed, you can see the central optical block, the one that is almost always the source of the haze.

To be able to unscrew it, it is necessary to use rubber cones, because the space is too restricted to be able to slip a pin wrench, or spanner.

To unscrew it, you have to press the cone on the block and turn. To gain grip, it is possible to use double-sided tape between the top of the cone and the optical unit.

There can then be two scenarios:
- The block is completely unscrewed, and we are happy,
- As in this case, the block has split in two and we will for sure have fun taking out its rear part.

In my case - and for my greatest happiness - only the front block is out, and you can see that the haze is in the remaining part. So we have to remove it as well.

As you can see, there are two holes on the plate provided for unscrewing. However, the space is very narrow and difficult to access. I managed to insert the tips of my spanner by separating the legs and holding them each in one hand (a bit like chopsticks).
To make it easier to unscrew, you can apply a little isopropyl alcohol or nail polish remover, that will soften the glue. Be careful not to pour too much because the diaphragm mechanism is underneath.

We can see here the haze problem is present in this block. The lens is almost opaque, what greatly tarnishes photos.

Here is the rest of the deck. The upper part is on the left of the photo. The golden ring we see here is under the block we just removed.
This part can also be unscrewed, with rubber cones to hold the two parts. This allows us to clean the two lenses, and to remove the haze that bothers us.

You can see at the top left the glue that needs to be dissolved to be able to unscrew the remaining part and access the two lenses.

Once the glue is dissolved, just clean the lenses. Given their opacity, the operation will require a complete cleaning, that should be repeated several times.

The lens of the large block is removed from this one, unlike the other that is sealed.
Be careful to note its position. If you put it back upside down, you will have to disassemble the lens again.

For cleaning, you can start with one application of isopropyl alcohol, followed by several applications of lens cleaner. Repeat until the haze disappears. Let it dry for a few minutes between each application.

Once the optical group has been replaced, you have to turn the focusing ring to the infinity position and set the front part of the lens well in front of infinity, as when disassembling.

Hopefully, when you turn to see the thread, the first mark you made will also be in its original position.
All that remains is to replace the two screws and put the protective rubber back in place. Consider testing the lens to make sure all lenses have been repositioned correctly.
Voila ! You can once again take advantage of this fabulous lens, which has unquestionably one of the best quality/price ratios on the second-hand market today.