

Mis à jour le 04/09/2021 à 17:13.
I've have already seen a few copies of this lens, and the most common thing I've seen so far it that they do collect dust inside. This is the main reason why it is possible to find copies of this wonderful lens for rather low prices.
What most people don't know is that this lens is still to be found on the Nikkor catalog and can bought new (500€ new, 350€ in very good condition). So friends, before selling your copy cheap, why not refreshing it a bit, and maybe you'll change your mind about selling it.
Our patient
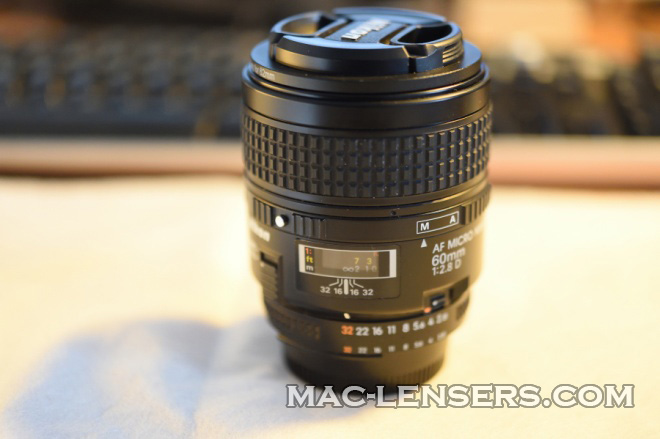
I got this lens for 150€ from a retired dentist. He was using it to photograph mouths, he explained that this lens allowed him to get the right colors so prothesist can make fake teeth of exactly the same color as the original ones. Why it was cheap? dust. I tried to bargain a bit but our dentist friend was though in negotiation and he had invited me and my wife for a coffee in a rather nice place, so, I didn't insist much.
OK, let's clean it !
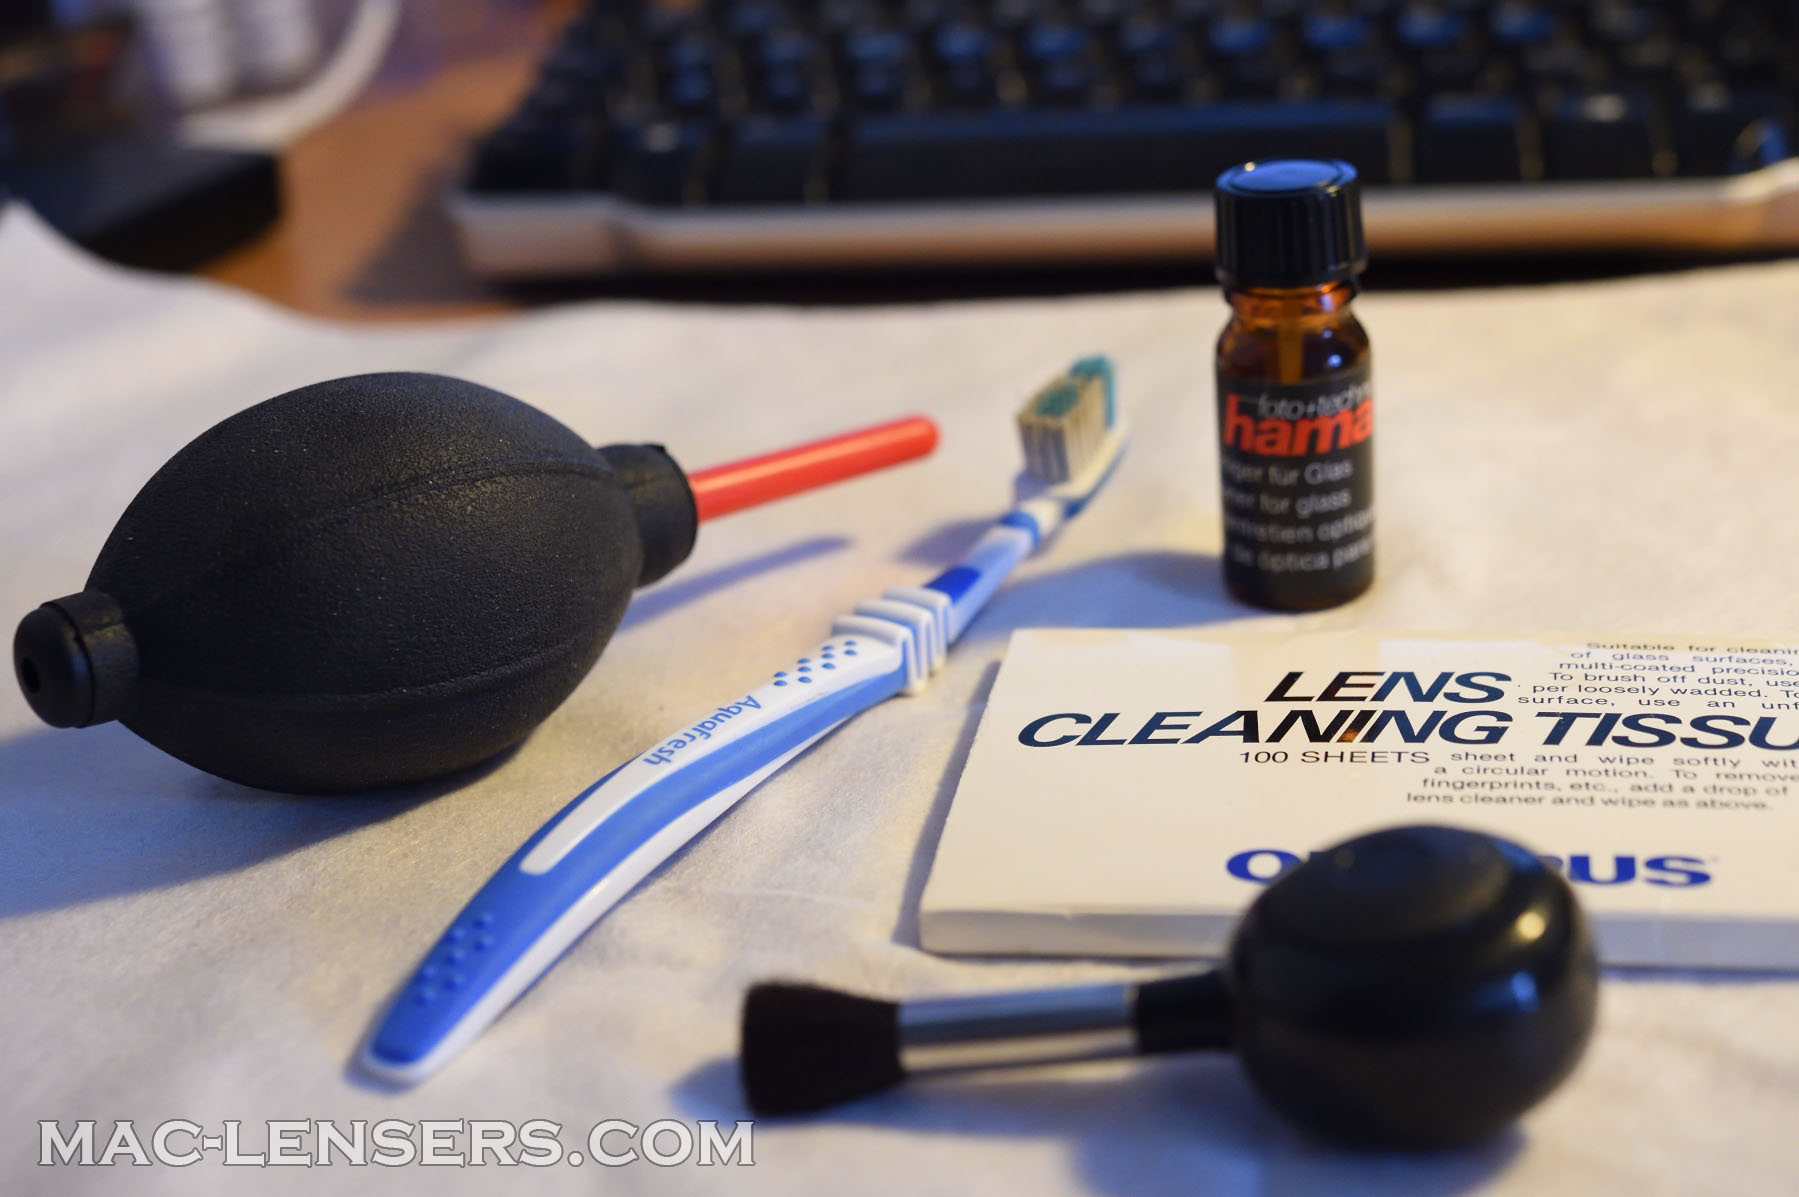
Cleaning dust is a simple task, you only need (like everything in life) the right tools for the job. Here they are,
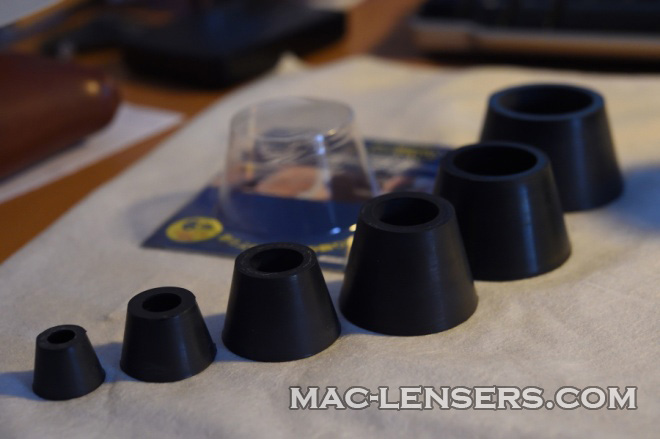
- Friction wrenches (they are just simply rubber cones as shown in the picture). Here you can buy a set, they are really good, and made to last, I've used mine for 5 years without signs of significant wear.
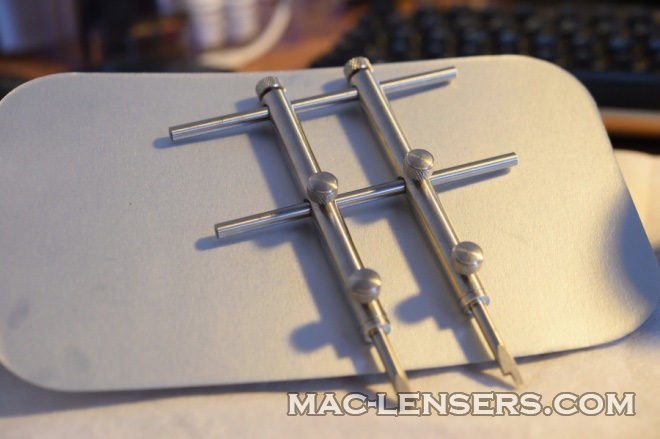
- spanner key. There is a huge amount of models out there, what I like about this one is that you can reach certain "depth" within a lens.
- J-type screwdrives (the J is for Japanese Norm, they differ from the Phillips in that they are a bit more pointy than them). If you fix Nikkor lenses like I do, the ones I use the most are the J000 and J00. Ocassionally the J0, and seldom the J0000. Here you can buy a nice quality kit.
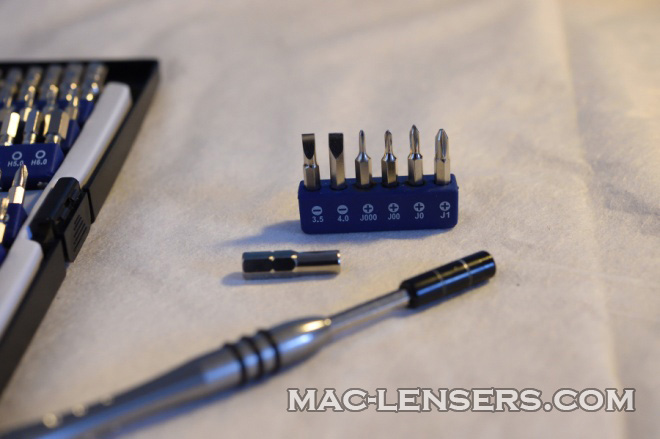
One very important accesory that people usually neglect is the adaptor from small screw-driver to big screw-driver. Why it is important? well, small screw-drivers are thin. This means little surface to have a good grip and therefore, little torque can be produced. On the other hand, a standard, regular-size screw driver is made to give good grip, and thus high torque.
Last but not least, we have the cleaning kit itself. Optical cleaning paper, optical cleaning fluid (vinegar or isopropyl alcohol work too), a small brush with a blower (useless), a real blower, and a toothbrush. The latter I use to clean the rubber parts of the lens, which tend to get withish after a few years.
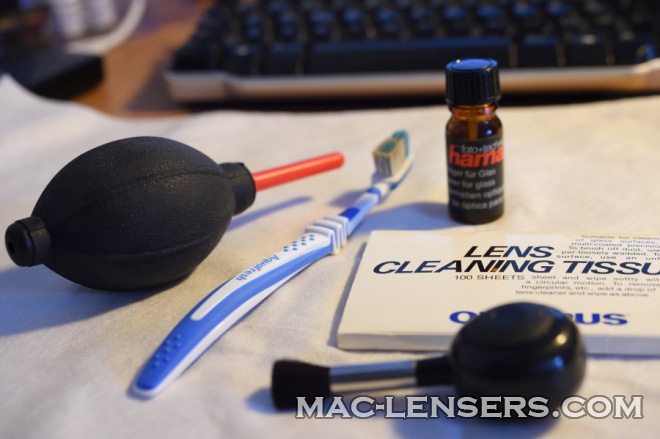
There are more exotic products like lighter fluid, or BBQ gas to dissolve old grease in helicoils, but we won't be needing that today.
Let's open the lens,
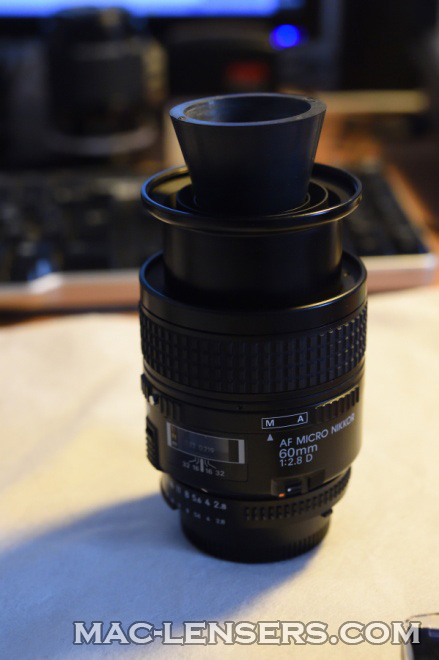
We start by removing the front element. This is really easy, put the lens in manual mode, go to the smallest focal distance, put the rubber cone in, and rotate counter-clock-wise. Some torque is necessary, don't worry about it, and go ahead.
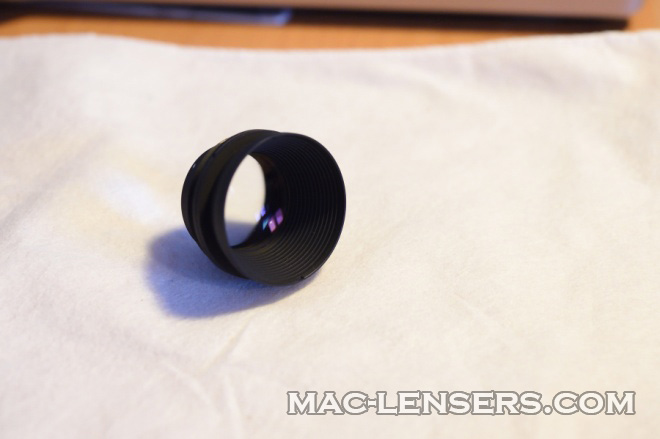
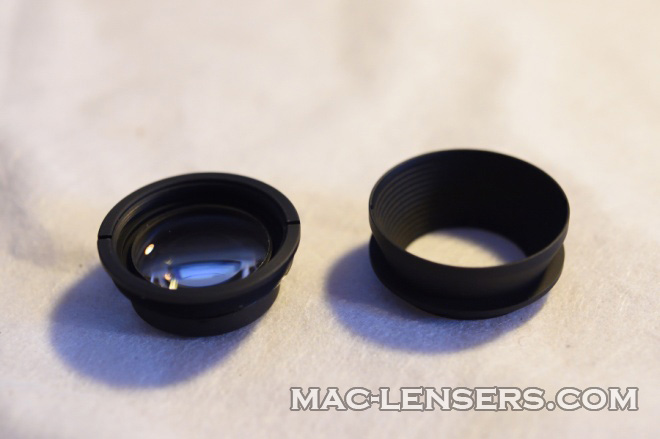
Two things can happen, you can get the cup alone (like in the image below at rightmost), or it can come with the fist optical group (our case, left image below). If the first optical group remains in, you can use the spanner key to remove it. A trick I use is to put some tape over the glass just in case. If the key slips and touches the glass, you'll certainly scratch it, the tape diminishes that risk.
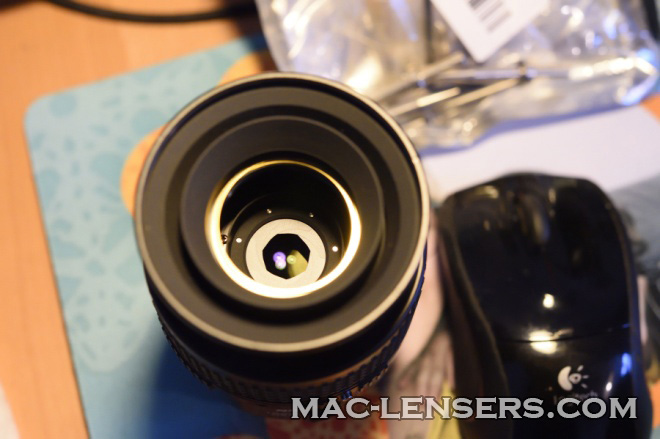
By removing the first optical group, we reach immediately the iris and the lens behind it. As we're just cleaning dust, you can gently brush the particles to detach them from the glass surface, then, blow them away with the blower. Next, you spread a bit of optical cleaning fluid over the surface, and then clean it with the optical cleaning paper. To finish, we blow once more, and that's it.
We're done with the front !
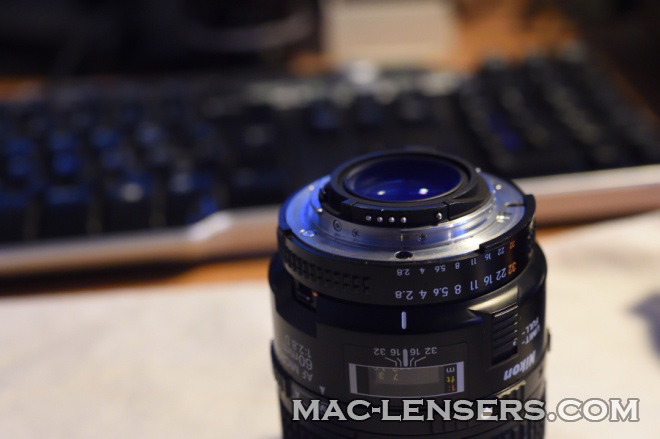
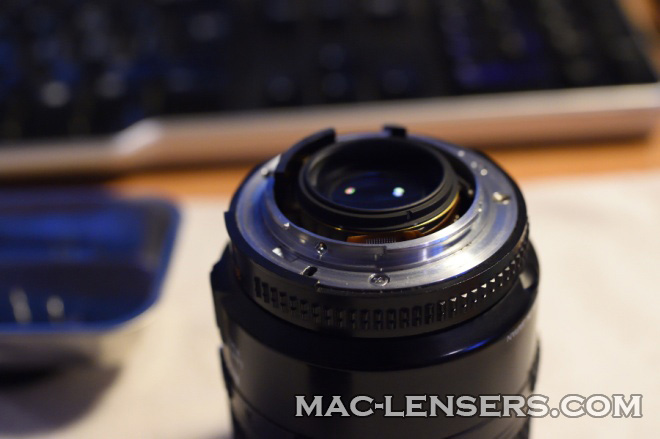
The back is just as easy, you don't even need to remove the bayonnet (you better not, many people fail to reassemble the back of this lens). You must however remove a few screws (the ones around the cylindrical part retaining the black plastic part). There are two screws just a bit smaller and in front of the connector block. You don't need to remove them.
Note that I'm working over a white cloth. I do this for the following reasons: I can lay glass on it without fear of scratching it; if a screw drops, it won't bounce and I'll be able to find it immediately.
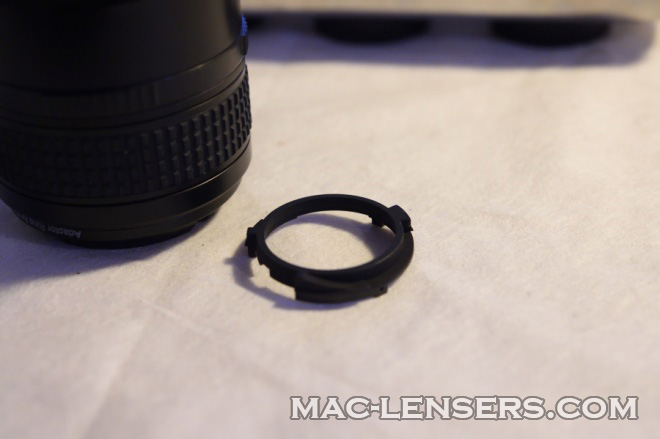
So, after removing the 3 screws on the cylindrical part, we can remove the plastic ring below (it should be easily removable, if not, check that all 3 screws have been removed). There is also one screw that "pushes" on the ring, get it loose only (you don't need to remove it)
Next, using the spanner, you can remove the first back element. Be careful not to deform (or lose) the brass washers, they are used to calibrate the flange distance and produce maximum sharpness. Be careful with the electronic parts too.
Next, the second lens. Still with the spanner key. To remove it, since it is at a depth, you can use plastic tweezers (which are alos useful to put it back later).
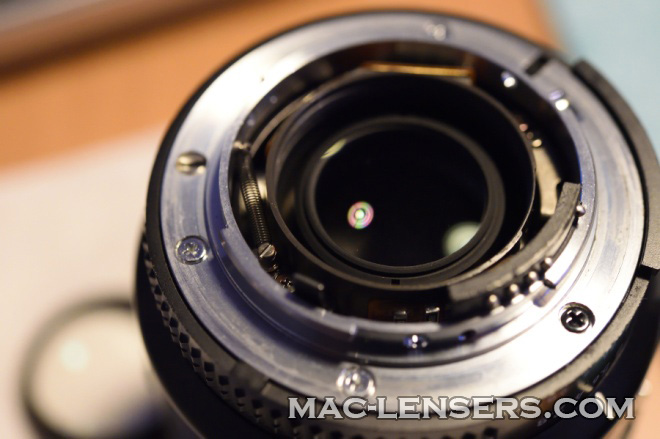
There is still one lens that we haven't removed yet (you can remove it if you have a suction cup). It is the lens we saw from the other side (behind the iris). We brush it (if needed) and then blow. As before, we spread some optical cleaning fluid and clean immediately (it evaporates quickly) using the optical cleaning paper. To finish, blow once more.
Repeat the same cleaning operation for the other elements, reassemble, and you're done. Your lens is good for another 20 years :)