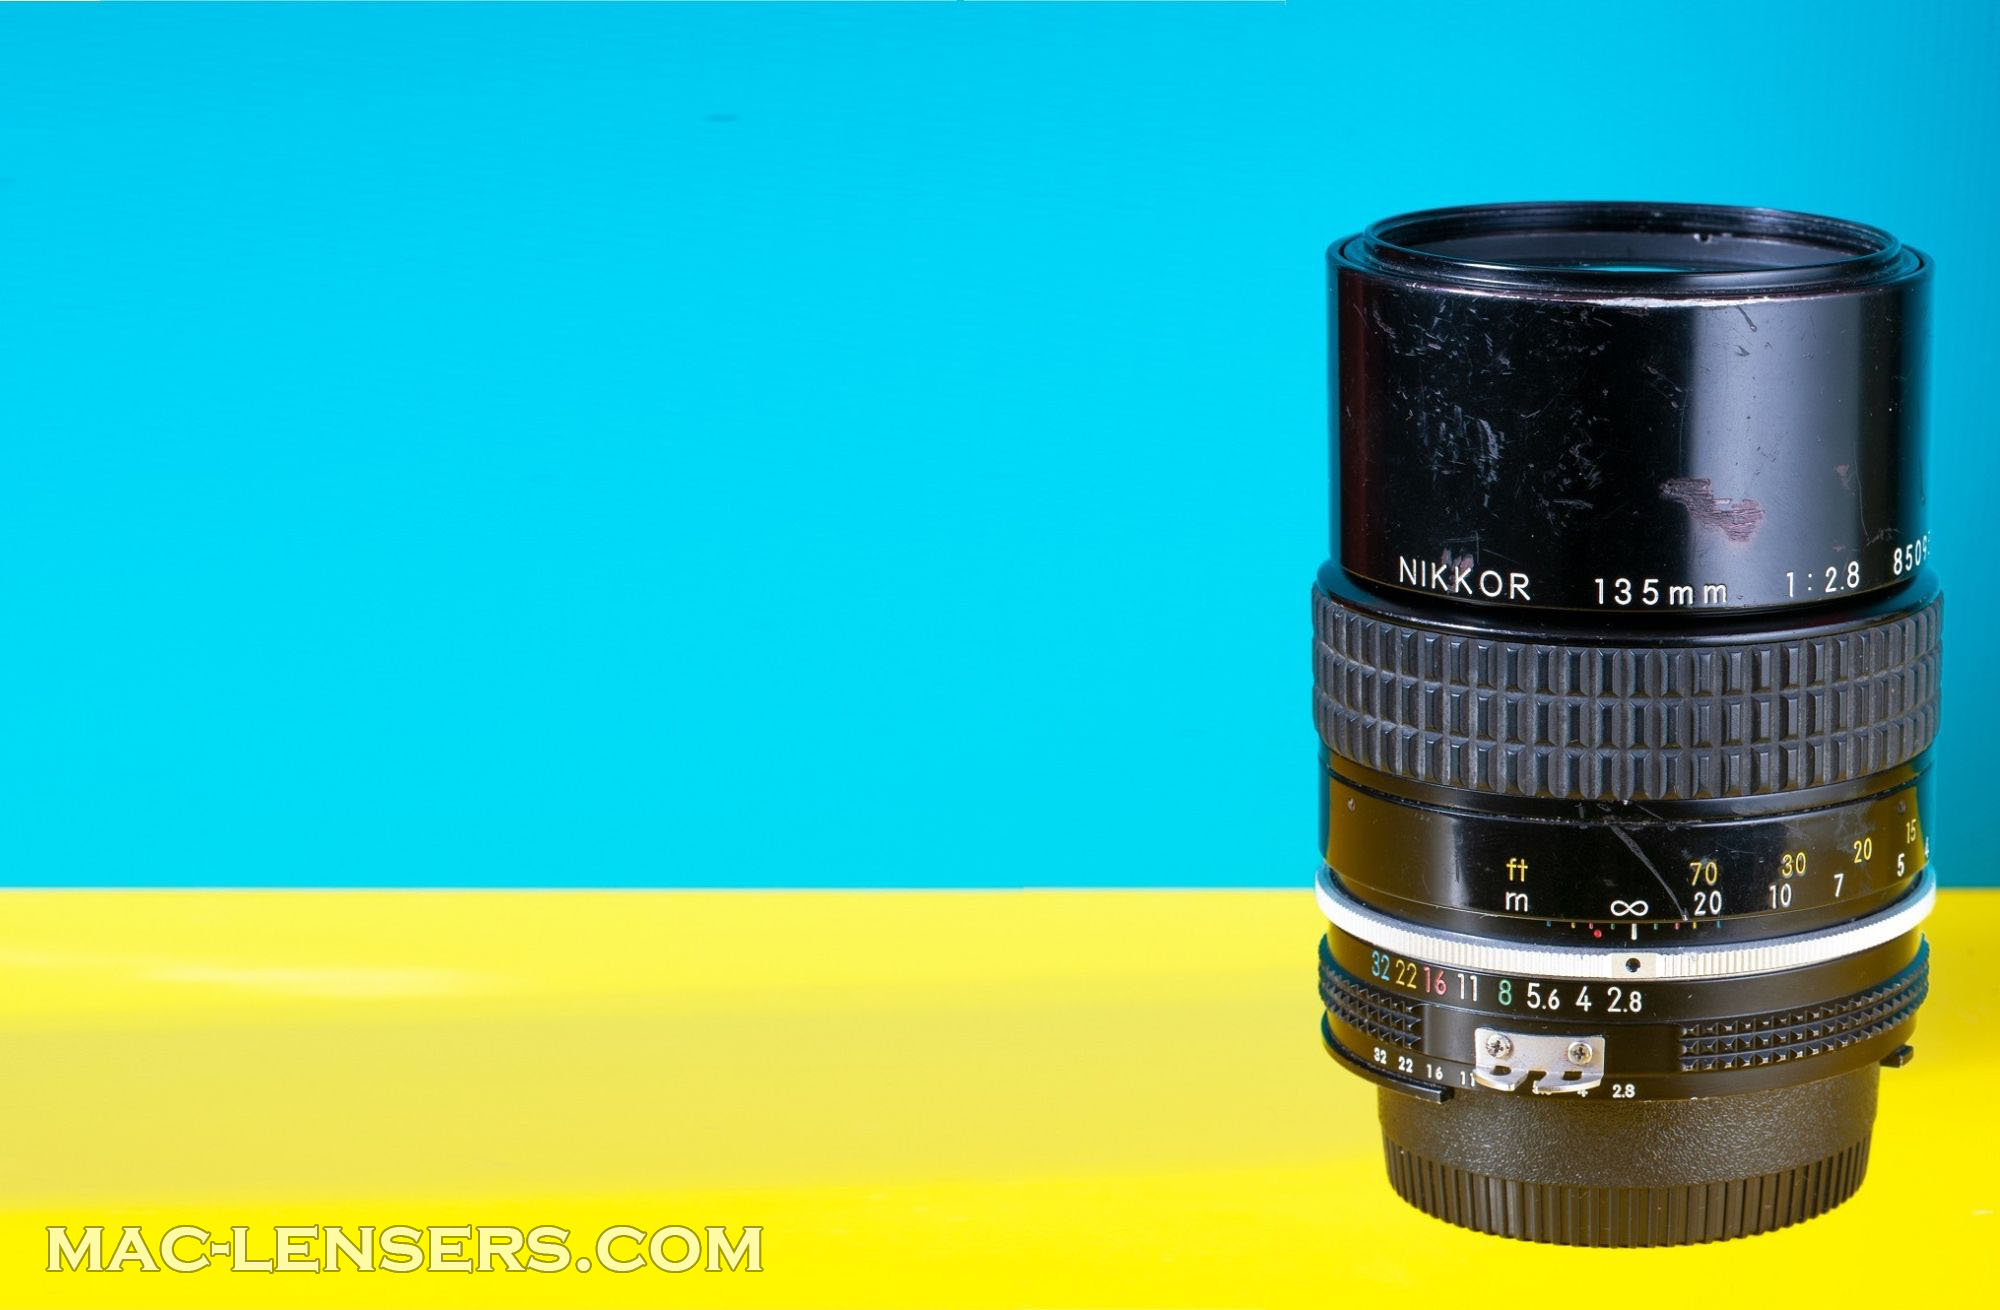


Hello friends,
Today we’re going to disassemble the excellent Nikkor 135mm f/2.8 Ai to remove dust and to clean an oily diaphragm. This lens was found by my friend Pete Motitas very cheap because it is in really bad condition as you can see on the cover of the article.
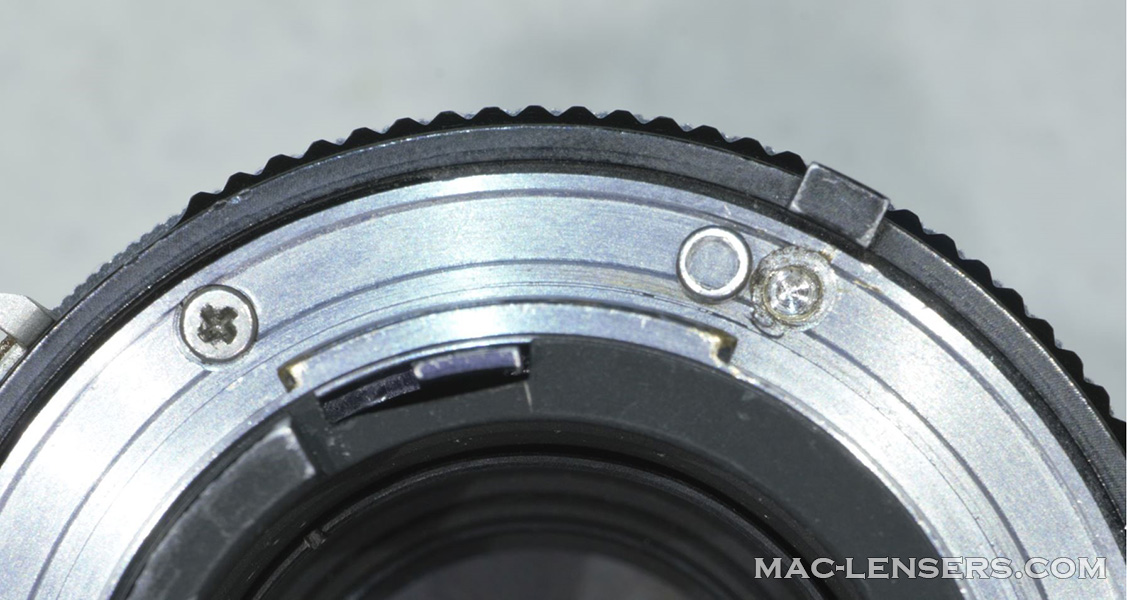
But that’s not the only blemish, someone actually tried to open the lens with pitiful results, see below. The small ring you see in the picture is what remains of the screw head after we drilled it. The imprint was gone and impossible to get any grip whatsoever from it.
This is what you get if you use the wrong tools, in this case, Phillips screwdriver tips instead of J ones.
The lens was also very dirty on the inside and the diaphragm is blocked, but we forgot to take a photo of that. Anyway, we’re going to open the lens in order to remove the optical assembly.
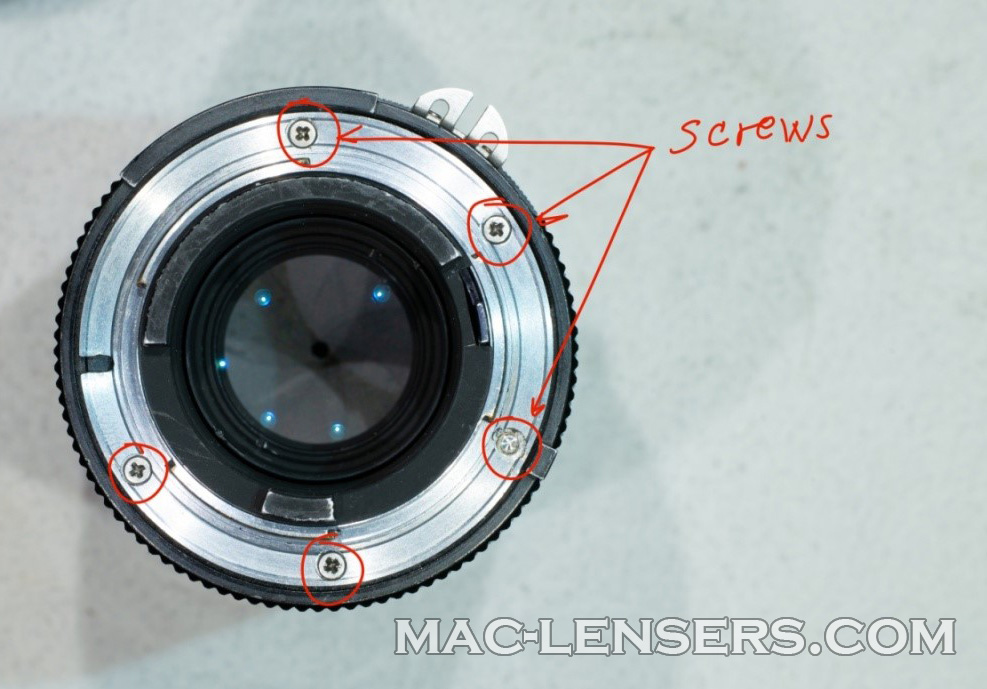
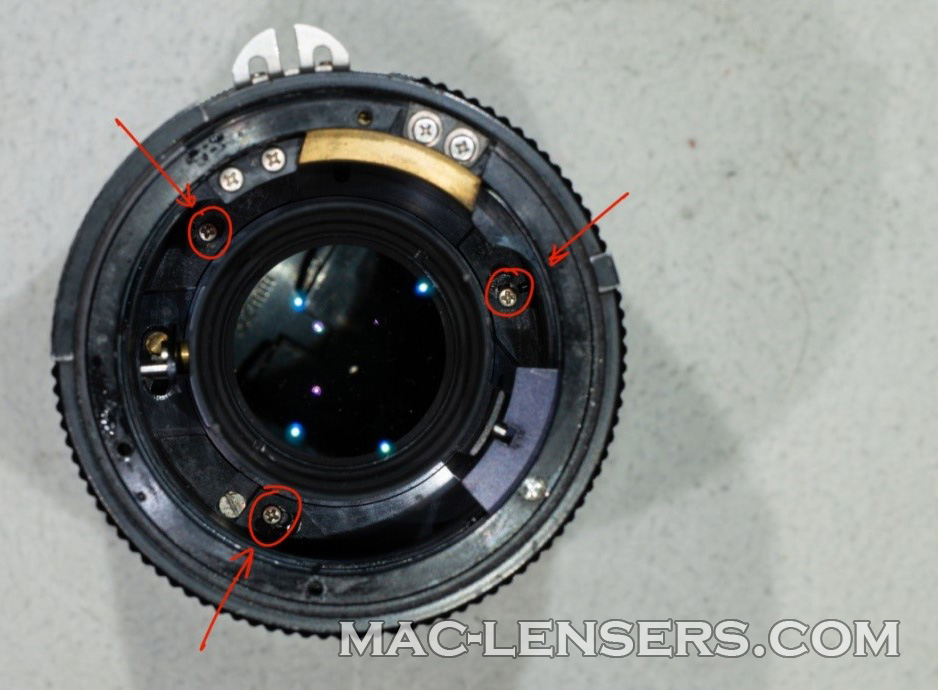
To do so, start by removing the 5 screws of the bayonet (4 in our case), you’ll need a J00 screwdriver.
Once the bayonet is removed, you’ll see this, there are still 3 screws on the bottom that you need to remove. They are a bit recessed so you’ll need a thin and long screw driver (Size is J000).
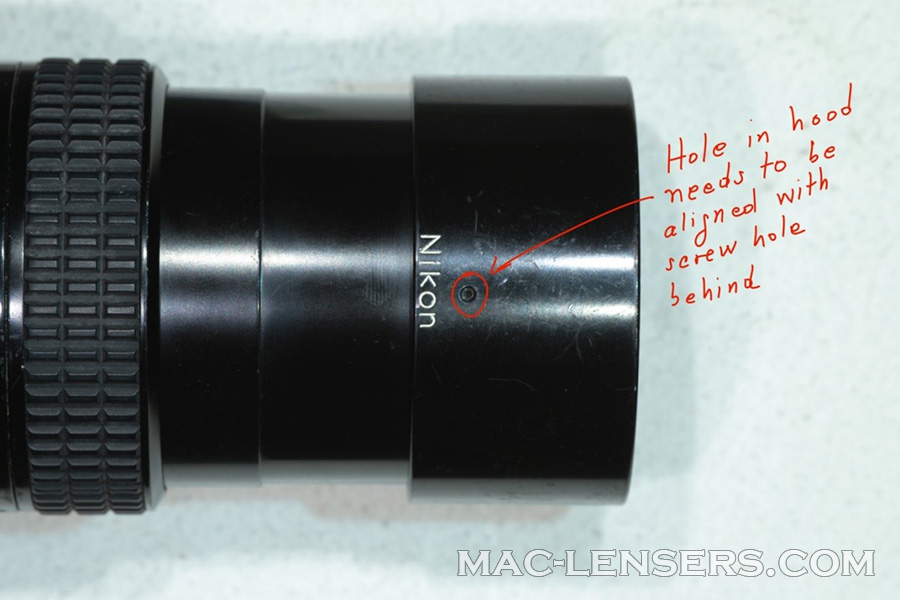
It is normal that nothing can be yet removed; we still have to work on the front to be able to remove the optical assembly. First, you need to locate a small hole on the hood, and align it with a screw hole that is behind.
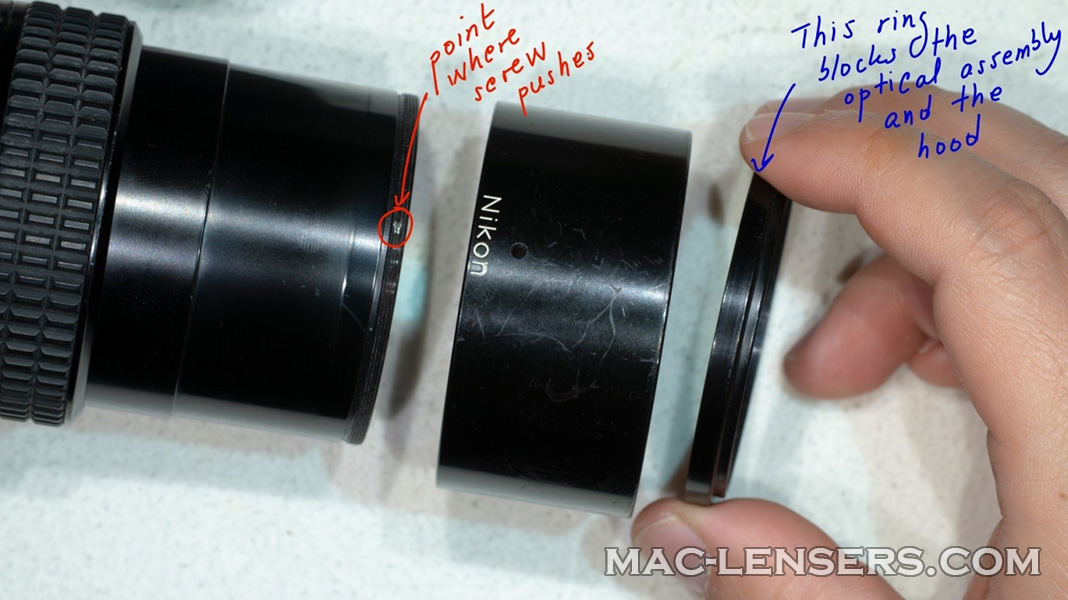
You need to unscrew partially the screw, or remove it. It is very small, so be careful not to lose it. Then, you can unscrew the front ring, as in the picture.
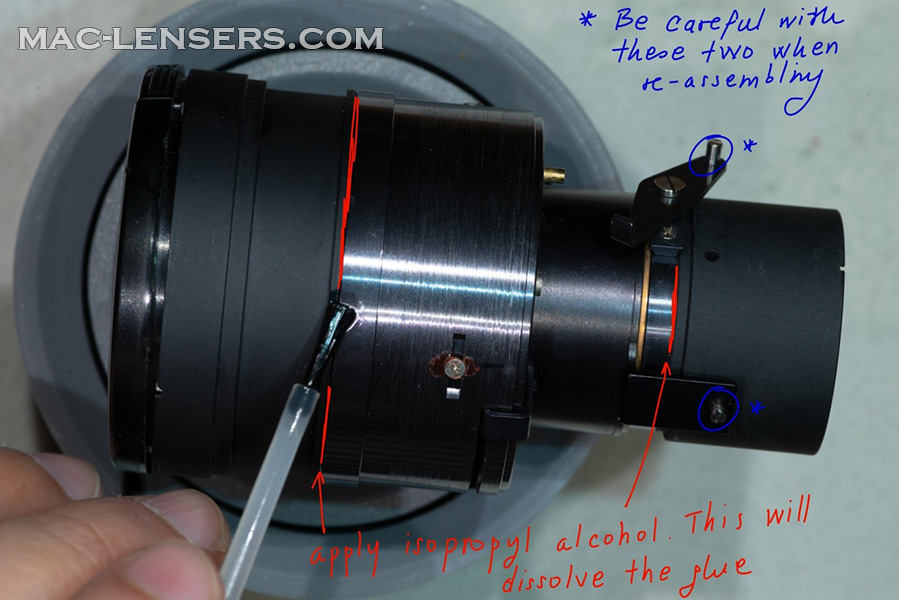
And then, you get the optical assembly. As the image suggests, you need to apply some isopropyl alcohol on the seams to dissolve the glue, and remove the elements that have the optics.
And once you have removed the optical blocks, you can remove dust, fungus and other things from the glass.
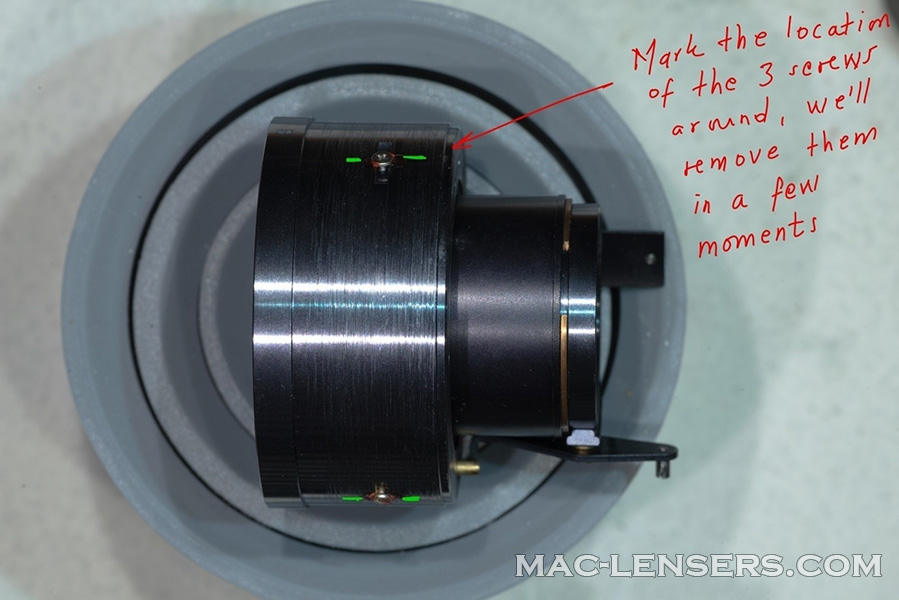
Let’s continue with the disassembly of the diaphragm block. You should have something like this now, and it is very very important that you mark the screws position (we’ll need that after).
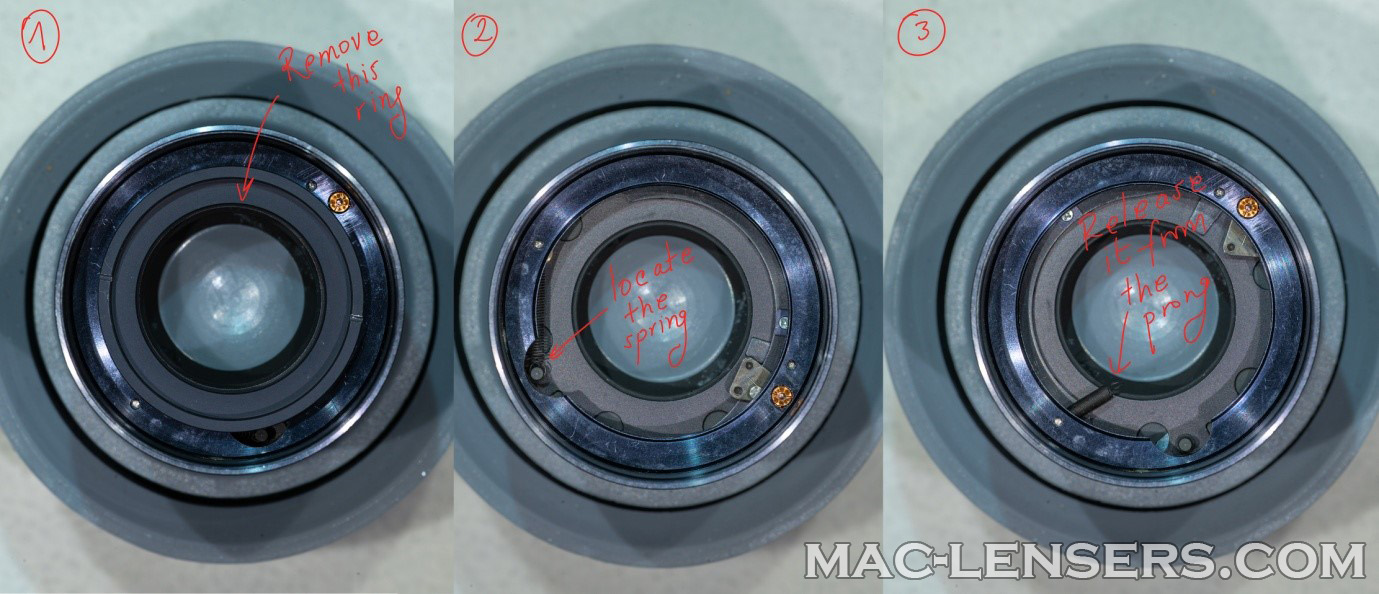
Then, we flip the diaphragm assembly as on the picture, remove the first cover, and release the return spring of the mechanism from its prong using fine tip tweezers.
And now, we can remove the screws we marked before.
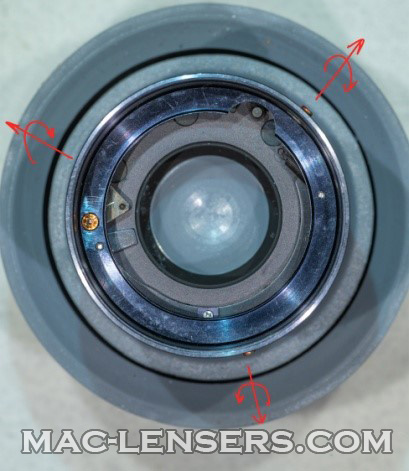
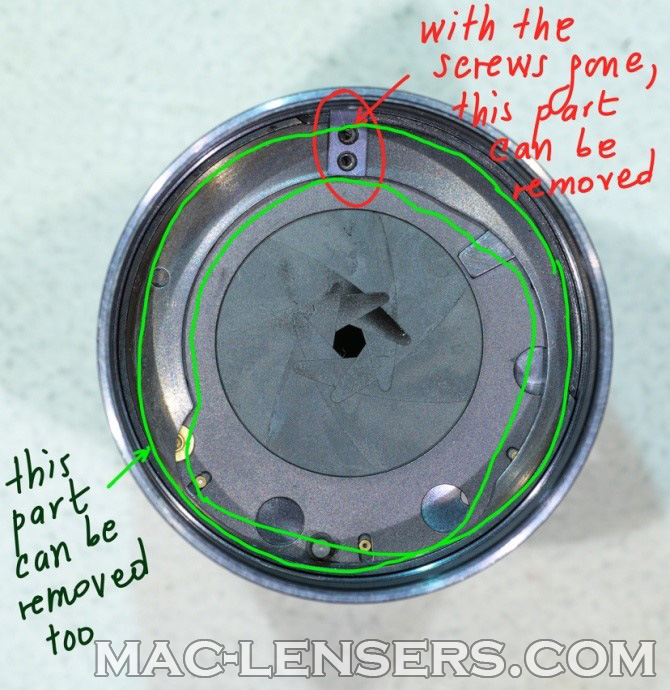
With the three screws gone, we can remove that part, and now, this is what you should see.
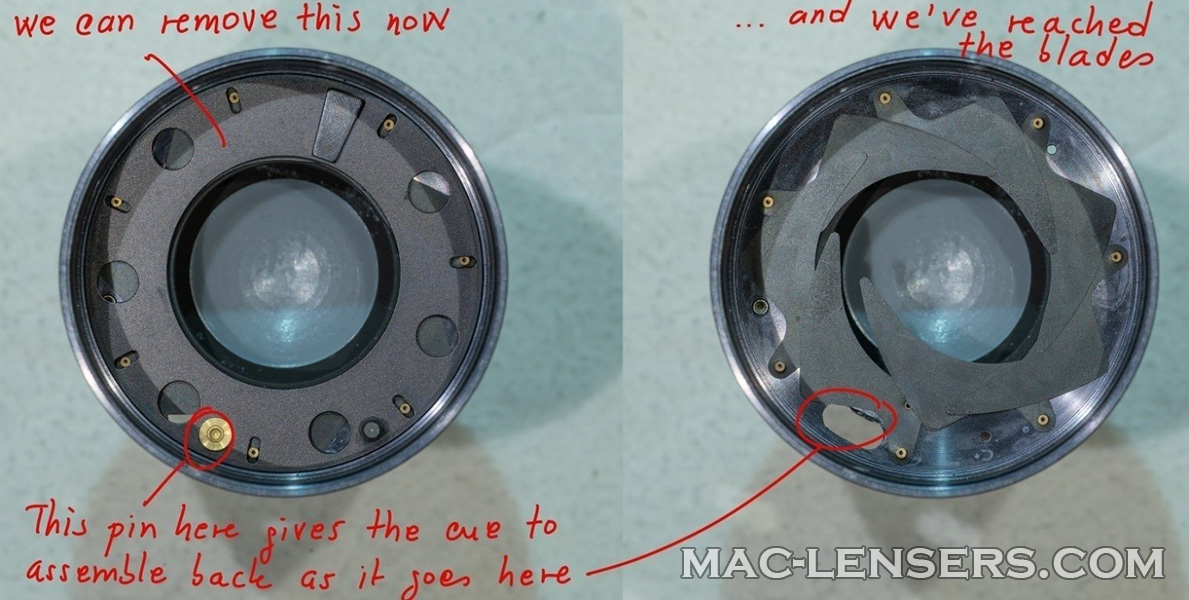
We proceed to the next step.
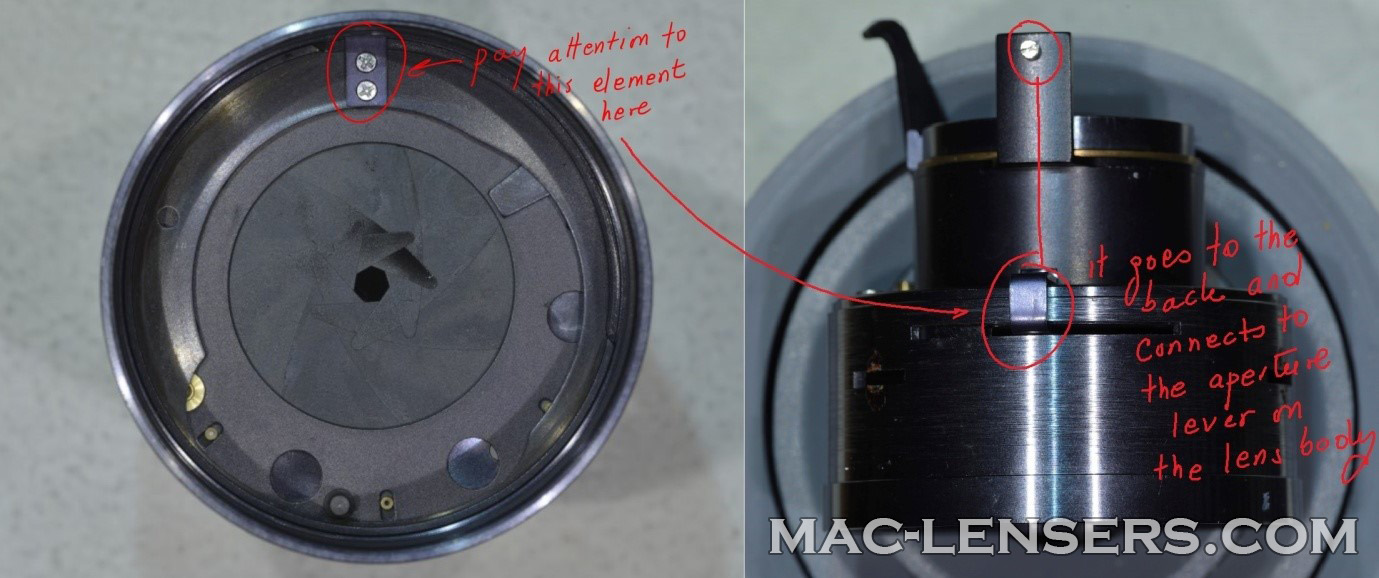
And finally, we have reached the aperture blades, so we can remove and clean them.
My recommended method to clean the aperture blades is to degrease them using lighter fluid, then you can dry them using toilet paper.
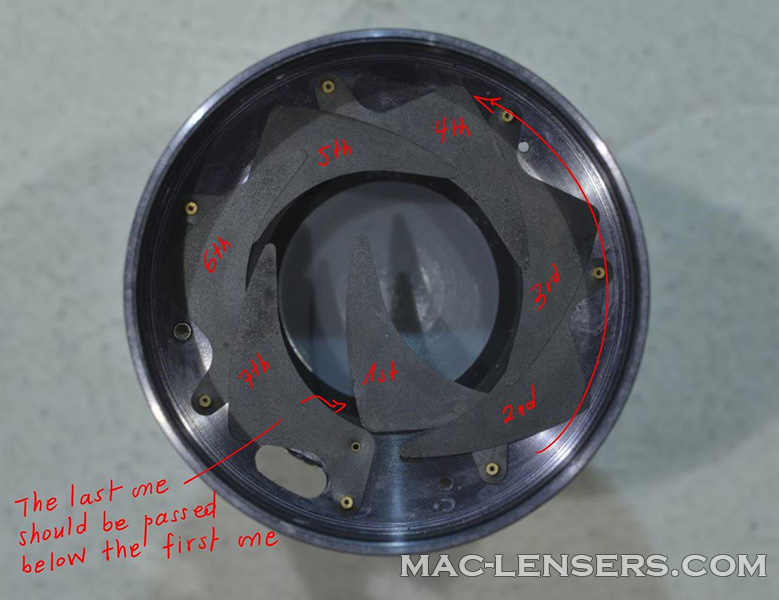
To reassemble the aperture blades afterwards, it is very important to use a counter-clock wise sequence, as below.
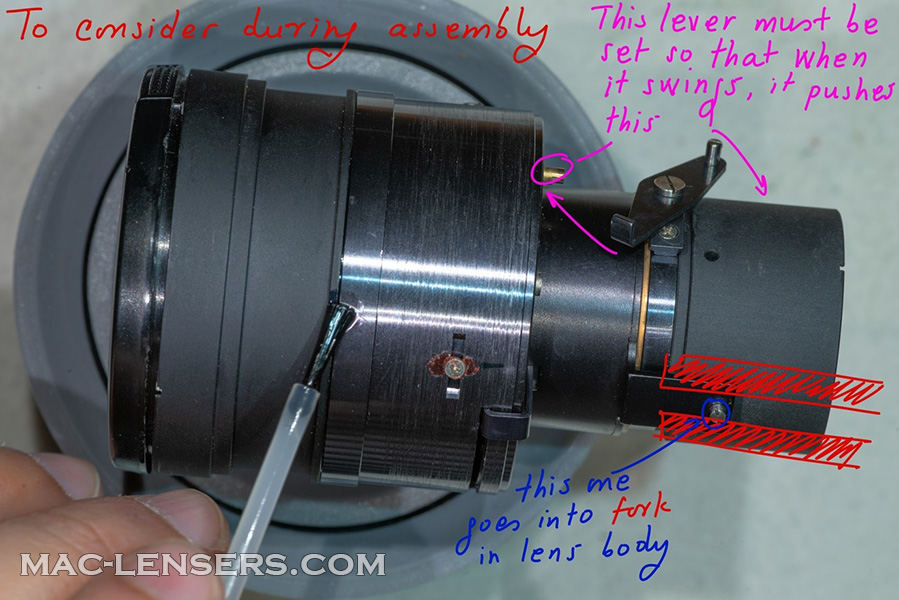
For the reassembly, you need to follow this tutorial backwards. And, when entering the optical assembly into the body, pay attention to the image below, otherwise, it should go smoothly.